| Главная » Используем сторонние шрифты для TextView | |
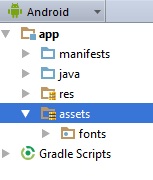
Давайте немного расширим наши знания в работе с текстом при создании Android приложения. Мы изучали способ отредактировать текст с помощью любимой и знакомой многим HTML верстки. Но в этом уроке мы применим к тексту самые настоящие шрифты, как это делается, например, в фотошоп. Прежде всего, для того, чтоб использовать шрифты, их неплохо бы скачать:). Поэтому скачайте с Интернета несколько разных шрифтов (я буду использовать в уроке 3 вот таких, можете скачать их). Создаем новый проект, выбираем обычный Blank Activity. Первым делом нужно создать для наших шрифтов специальную папку для их хранения. Создаем папку по имени assets, она должна находится на одном уровне с папкой res приложения, а внутри папки assets создаем папку fonts:
И в папку fonts помещаем наши шрифты. Переходим к редактированию файла activity_main.xml. Здесь нам нужно создать 3 элемента TextView:
<LinearLayout
 xmlns:android="http://schemas.android.com/apk/res/android"
 android:orientation="vertical"
 android:layout_width="fill_parent"
 android:layout_height="fill_parent">

 <TextView
 android:layout_width="match_parent"
 android:layout_height="wrap_content"
 android:id="@+id/tv1"
 android:text="Шрифтик"
 android:textSize="50dp"
 android:gravity="center"/>

 <TextView
 android:layout_width="match_parent"
 android:layout_height="wrap_content"
 android:id="@+id/tv2"
 android:text="Шрифт"
 android:textSize="50dp"
 android:gravity="center"/>

 <TextView
 android:layout_width="match_parent"
 android:layout_height="wrap_content"
 android:id="@+id/tv3"
 android:text="Шрифтище"
 android:textSize="50dp"
 android:gravity="center"/>

</LinearLayout>
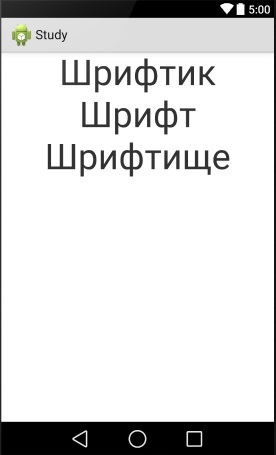
У нас получился следующий вид:
Теперь открываем файл MainActivity.java. Здесь мы создадим ссылки на наши шрифты в папке fonts, объявим объекты типа TextView и привяжем их к созданным нами элементам, а также объявим сами шрифты и применим их к нашим текстовым элементам. Полный код MainActivity.java выглядит так:
import android.app.Activity;
import android.graphics.Typeface;
import android.os.Bundle;
import android.widget.TextView;


public class MainActivity extends Activity {

 @Override
 protected void onCreate(Bundle savedInstanceState) {
 super.onCreate(savedInstanceState);
 setContentView(R.layout.activity_main);

 //Задаем путь к нашим шрифтам:
 String fontPath1 = "fonts/gEgTpTJy.ttf";
 String fontPath2 = "fonts/rGoNYF7u.ttf";
 String fontPath3 = "fonts/2fsgcYT7.ttf";

 //Объявляем объекты типа TextView и привязываем их к наших элементам:
 TextView textView1 = (TextView) findViewById(R.id.tv1);
 TextView textView2 = (TextView) findViewById(R.id.tv2);
 TextView textView3 = (TextView) findViewById(R.id.tv3);

 //Объявляем сами шрифты:
 Typeface typeface1 = Typeface.createFromAsset(getAssets(), fontPath1);
 Typeface typeface2 = Typeface.createFromAsset(getAssets(), fontPath2);
 Typeface typeface3 = Typeface.createFromAsset(getAssets(), fontPath3);

 // Применяем шрифты к соответствующим текстовым элементам:
 textView1.setTypeface(typeface1);
 textView2.setTypeface(typeface2);
 textView3.setTypeface(typeface3);
 }
}
Запускаем приложение и смотрим на наш результат:
Надеюсь вам понравился урок, удачи! | |
|
| |

| Всего комментариев: 0 | |

